


What is a Clutch Alignment Tool?
The clutch alignment tool is a type of tool that ensures correct alignment during clutch installation. Some people call it a clutch centering tool, clutch disc alignment tool, or clutch pilot alignment tool. Although the tool is available in many designs, the typical type is often a threaded or splined shaft with parts to align the clutch disc with the pilot bearing.
The purpose of clutch alignment tool is to help to make the process to install your clutch simpler and more accurate. That means a useful tool for mechanics, but more so DIY car owners who find clutch replacement a daunting process.
There are several reasons to not install a without alignment tool clutch tool. The procedure can be quite difficult and a trial-error job. Most of the time, you will only realize the clutch is not properly aligned just when you’re about to finish the installation, forcing you to start all over.
With the clutch centering tool, the disc will not slip out of alignment when installing the pressure plate. This makes the installation quick and smooth. Most of the time, the tool comes as a kit. The contents of the kit are explained below.
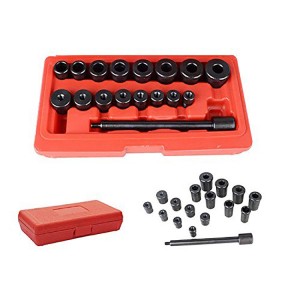
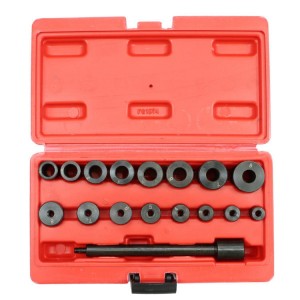
Clutch Alignment Tool Kit
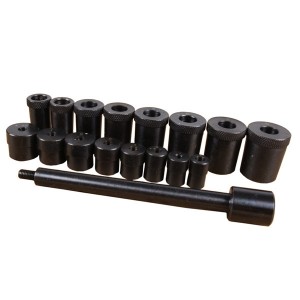
The clutch alignment tool inserts into the transmission shaft, and must have splines that match those of the shaft. Because different cars use shafts with different number of splines, one clutch tool cannot fit all vehicles. So it often comes as a kit.
A clutch alignment tool kit is supposed to allow you to install the clutches of different vehicles. Its contents include the main alignment shaft, pilot bushing adaptors, and clutch disc centering adapters. The adapters make the kit compatible with different transmission shafts and pilot bearings.
Some kits are also universal. A universal clutch alignment tool kit serves many different vehicles, which makes it more versatile. Based on your needs, you may only need a specialized clutch tool for your type of car or a universal kit to use on several different vehicles.
What Does a Clutch Alignment Tool Do?
When mounting a clutch, the disc must align with the flywheel and pilot bushing. If it doesn’t, the clutch won’t engage with the transmission shaft. The purpose of clutch alignment tool is helping center the clutch disc and plate with the pilot bearing. This allows you to correctly mount the transmission.
The clutch tool is designed with a splined or threaded body and a cone or tip at one end. The cone or tip locks in the pilot bearing- the recess on the crankshaft- helping to lock the clutch in place. This prevents the clutch disc from moving about until you install the transmission.
As it is evident, the working of the clutch alignment tool is very straightforward. It holds the aligning movable components in place. By preventing their movement, the tool allows you to install the transmission correctly and without difficulty.
How to Use a Clutch Alignment Tool
When you have a bad clutch in your car, you will want to replace it. And if you’re a DIY enthusiast, change it yourself and save both time and money. Now that you know what a clutch alignment or clutch center tool is, you mostly likely want to understand how to use it. Here is how to use a clutch alignment tool.
Step 1: Choose Clutch Alignment Tool
● The splines on the clutch tool must match those of the input shaft. If they do not, the tool will not fit.
● Make sure you’re using the correct tool based on your car make.
● If you’re using a kit, pick adapters that suit your car type to ensure a snug fit.
● If using a clutch alignment tool kit, this means choosing from the many pieces.
Step 2: Insert the Clutch Tool
● Start by inserting the clutch tool into the new clutch disc.
● Let the tool stick through the splines.
● Next, position the clutch on the flywheel
● Insert the tool into the pilot bearing. This is the recess in the crankshaft.
Step 3: Attach the Pressure Plate
● Assemble the pressure plate on flywheel.
● Insert the bolts that hold it to the flywheel.
● Confirm if the clutch alignment tool is firmly seated and locked in the pilot bearing or bushing.
● Once sure, continue to tighten the pressure plate bolts using a crisscrossing pattern.
● Finally, tighten the bolts to the recommended torque specs.
Step 4: Install the Transmission
● Do not remove the alignment tool until the transmission is ready for installation. This is to prevent misalignment and having to start all over again.
● Once ready, take out the clutch tool.
● Slip the transmission into place. Your clutch installation is now complete.
Post time: Jan-06-2023